The @image module contains a single class @image which represents a 2D image,
and related functions.
Methods
An image is represented internally as an array of pixels, which can be manipulated. Each pixel is 32 bits: 8 bits for each of the color components (red, green, blue), and 8 bits for alpha (transparency). This allows the color of each pixel to be represented as a 32-bit integer.
The order of the pixels is left-to-right, top-to-bottom (just like text). The order of the components can be changed with set_color_format().
Most methods return the image itself so that they they can be chained to save typing.
Most methods can take color as either number or string. When passed as a string, the color is converted to a number using color().
The following image is used in the examples below:
image(web.dl('https://axm.dev/pic.png'))

:new(path)
:new(width,height)
Create a new image.
Parameters
- path — the path to a PNG, BMP, or JPEG file
- width — the width in pixels
- height — the height in pixels
Return
- a new image
Notes
If no parameters are specified, an empty 0 by 0 image is created.
If path is specified, the image is loaded from a file.
If width and height are specified, a blank (all black) width by height image is created.
Load data from file into image.
Parameters
- path — the path to a PNG, BMP, or JPEG file
Return
- this image
Save image to file.
Parameters
- path — the path to a PNG, BMP, or JPEG file
Return
- this image
Clear all data and make the image 0x0.
Return
- this image
Allocate data for this image.
Parameters
- width — the width in pixels
- height — the height in pixels
Return
- this image
Notes
After calling, this image will be a width by height and blank (all black).
Get the width in pixels.
Return
- a number which is the width in pixels
Get the height in pixels.
Return
- a number which is the height in pixels
Get the size in pixels, which is equivalent to width() multiplied by height().
Return
- the size in pixels
Get the width() and height() as an array.
Return
- an array containing two elements, the width and height in pixels
Get the color of a pixel.
Parameters
- x — the x coordinate
- y — the y coordinate
Return
- a number containing the color of the pixel interpreted as a 32-bit integer
Notes
The method rgba() can be used to get individual components from the color.
Remember that 0,0 is at the top left.
If the coordinates are out of bounds, the behavior is to return the pixel that would be mirrored from the out-of-bounds edge. This is for compatibility with image algorithms that use kernels.
Set the color of a pixel
Parameters
- x — the x coordinate
- y — the y coordinate
- color — the color as a number or string
Return
- this image
Get components of a color.
Parameters
- color — the color as a number
Return
- an array containing the the color components in [r,g,b,a] order
Notes
All components are unsigned bytes, so they will be in the range [0,255].
Get the components of a color in HSL (Hue, Saturation, Lightness) color space.
Parameters
- color — the color as a number
Return
- an array containing the the color components in [h,s,l] order
Notes
Hue will be in the range [0,360):
- 0 = red
- 60 = yellow
- 120 = green
- 180 = cyan
- 240 = blue
- 300 = purple
Saturation will be in the range [0,1], where 0 = grayscale and 1 = pure color.
Lightness will be in the range [0,1], where 0 = black, 1 = white.
Convert a color to grayscale.
Parameters
- color — the color as a number
Return
- the luma value in range [0,255]
Create a color from string.
Parameters
- str — the color as a string; see notes for acceptable formats
Return
- the color as a number
Notes
Colors can be specified in one of the following formats:
- RGBA hex: #rrggbbaa
- RGB hex: #rrggbb
- RGBA hex, 16-bit: #rgba
- RGB hex, 16-bit: #rgb
- RGBA tuple: rgba(r,g,b,a)
- RGB tuple: rgb(r,g,b)
- HSLA tuple: hsl(h,s,l,a)
- HSL tuple: hsl(h,s,l)
- Constant: white, black, red, green, blue, orange, purple, yellow
For the tuples, RGB must be [0,255], alpha must be [0,1], hue must be [0,360), saturation [0,1], and lightness [0,1]. If alpha is not specified, it is assumed to be 0xff (255).
If str is actually a number, no processing is done.
Get the pixel color format.
Return
-
one of the following strings:
- argb
- abgr
- rgba
- bgra
Set the pixel color format
Parameters
- format — the format; see acceptable values in get_color_format()
- convert — boolean, whether or not to convert existing data in the image to the new format
Return
- this image
Set this image to a copy of another image.
Parameters
- s — another image
Return
- this image
Swap data with another image.
Parameters
- s — another image
Return
- this image
Set this image to the cropped area of another image.
Parameters
- x — the x coordinate
- y — the y coordinate
- w — the width of the cropped area
- h — the height of the cropped area
- s — another image (optional; if not specified, this image is used)
Return
- this image
Fill the image with a single color.
Parameters
- color — the color as a number or string
Return
- this image
Interpolate this image with another image.
Parameters
- s — another image
- p — the amount, see notes
Return
- this image
Notes
Each pixel in both images are blended using the following formula: a*p + b*(1-p), where a is every pixel in this image and b is every pixel in the other image.
If p is greater than 1, then a is "extrapolated" from b.
Blend this image with another image.
Parameters
- s — another image
- p — the contribution from this image
- q — the contribution from the other image
Return
- this image
Notes
Each pixel in both images are blended using the following formula: a*p + b*q, where a is this image and b is the other image.
Blur the image.
Parameters
- radius — the radius in pixels (optional, default=10)
Return
- this image
Example
image(web.dl('https://axm.dev/pic.png')).blur().save('blur.jpg')

Desaturate the image (convert to grayscale).
Return
- this image
Example
image(web.dl('https://axm.dev/pic.png')).desaturate().save('desaturate.jpg')
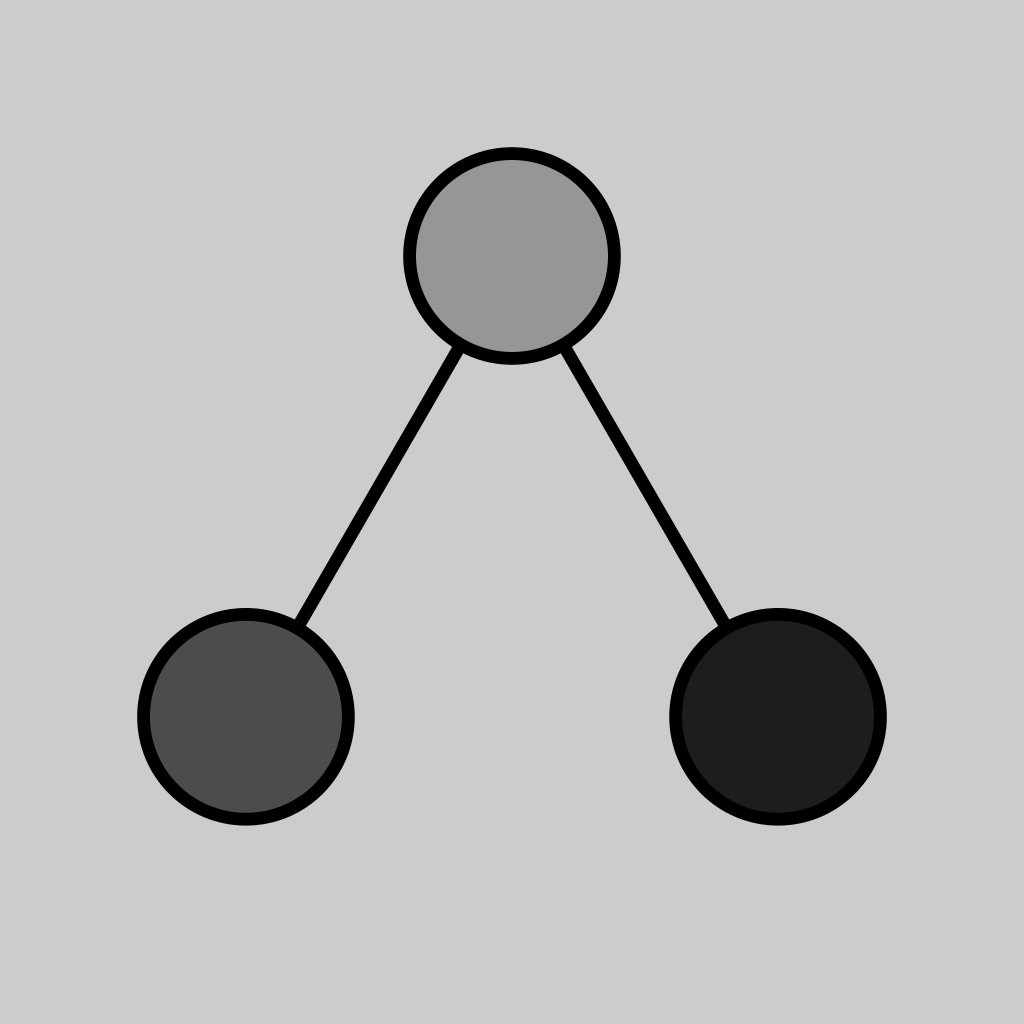
Sharpen the image by extrapolating from the average color.
Parameters
- amount — how much to sharpen the image (optional, default=3.0)
Return
- this image
Notes
Faster than sharpen().
Sharpen the image by extrapolating from a blurred image.
Parameters
- amount — how much to sharpen the image (optional, default=3.0)
- blur_radius — the radius to use when blurring the image (optional, default=2)
Return
- this image
Notes
Slower than lazy_sharpen() but should give a nicer result.
Saturate the image by extrapolating from a desaturated image.
Parameters
- amount — how much to saturate the image (optional, default=3.0)
Return
- this image
Negate the image (invert the colors).
Return
- this image
Example
image(web.dl('https://axm.dev/pic.png')).negate().save('negate.jpg')
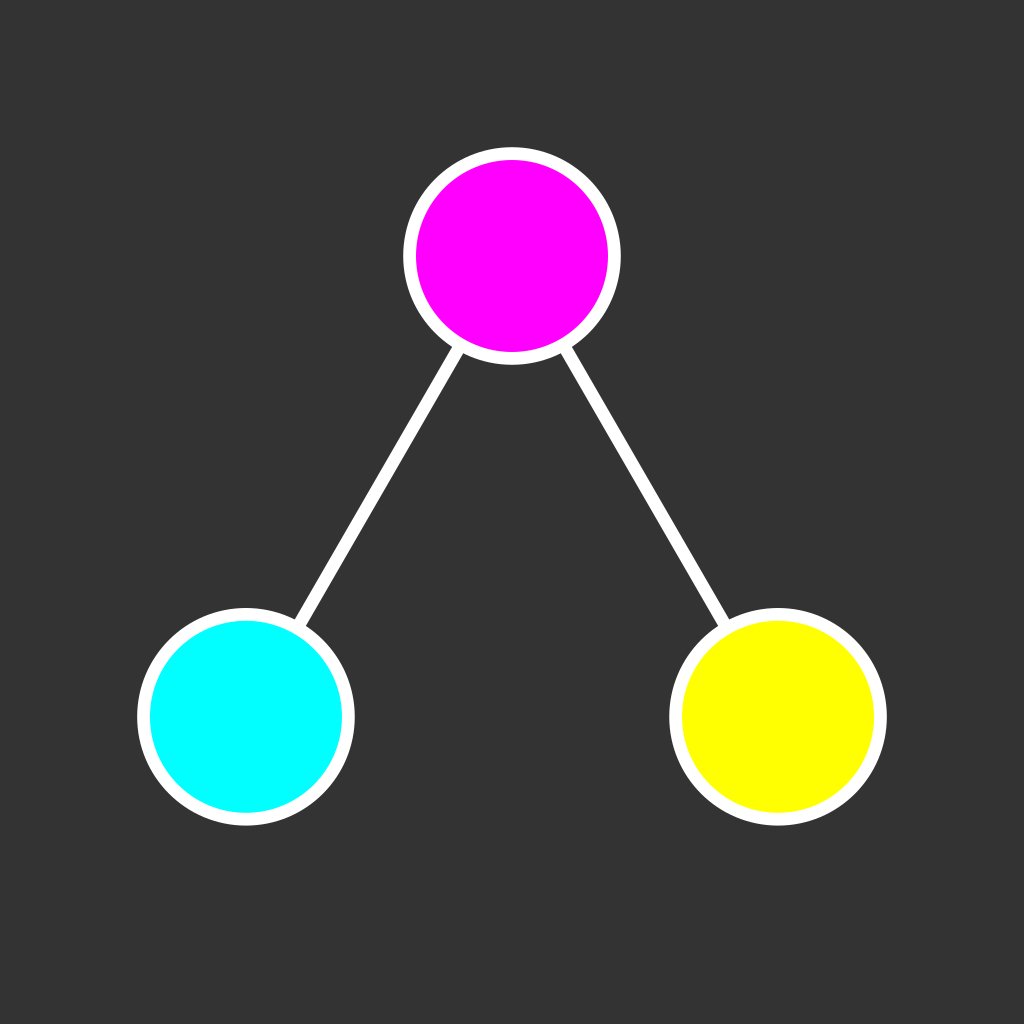
Brighten the image by extrapolating from black.
Parameters
- amount — how much to brighten the image (optional, default=1.25)
Return
- this image
:lazy_resize(w,h)
Resize this image using nearest-neighbor for in-between pixels.
Parameters
- scale — how much to scale both width and height (values <1 shrink the image, and values >1 enlarge the image)
- w — the exact width in pixels to resize to
- h — the exact height in pixels to resize to
Return
- this image
:resize(w,h)
Resize this image with upsampling/downsampling for in-between pixels.
Parameters
- scale — how much to scale both width and height (values <1 shrink the image, and values >1 enlarge the image)
- w — the exact width in pixels to resize to
- h — the exact height in pixels to resize to
Return
- this image
Notes
Slower than lazy_resize() but gives a better result.
Perform a threshold operation on the image, which changes all pixels white if > threshold, and black if <= threshold.
Parameters
- luma — the luma threshold [0,255]
Return
- this image
Get the average color of the image.
Return
- the average color as a number
Draw text on this image.
Parameters
- x — the x coordinate of the top-left of the text
- y — the y coordinate of the top-left of the text
- str — the text to draw
- color — the color of the text
- size — the font size to use (optional, default is 24)
- face — the font face to use (optional, default is "Tahoma")
Return
- the height of the drawn text in pixels
Notes
The text is bound by image width and will wrap.
The "Tahoma" font face is embedded within Axiom. If any other face is specified, the current directory and the operating system font directories will be searched for a TrueType (.ttf) file with the same name.
Get the width of the text given the font face and size.
Parameters
- str — the text to draw
- size — the font size to use (optional, default is 24)
- face — the font face to use (optional, default is "Tahoma")
Return
- the width of the text in pixels
Notes
Doesn't actually draw anything on the image; just used for layout calculations.
Get the line height given the font size and face.
Parameters
- size — the font size to use (optional, default is 24)
- face — the font face to use (optional, default is "Tahoma")
Return
- the height of a line of text in pixels
Notes
Doesn't actually draw anything on the image; just used for layout calculations.
Blit (copy image from) another image onto this image.
Parameters
- s — another image
- x — the x coordinate
- y — the y coordinate
- use_alpha — whether or not to use the alpha channel of s as a mask when blitting (optional, default=true)
Return
- this image
Draw a rectangle.
Parameters
- x — the x coordinate of the upper left
- y — the y coordinate of the upper left
- w — the width
- h — the height
- color — the color as a number or string
- thickness — the thickness of the line (optional, default is 1)
- filled — whether or not to draw the rectangle filled (or just the outline) (optional, default=false)
Return
- this image
Draw a line.
Parameters
- x1 — the start x coordinate
- y1 — the start y coordinate
- x2 — the end x coordinate
- y2 — the end y coordinate
- color — the color as a number or string
- thickness — the thickness of the line (optional, default is 1)
Return
- this image
Draw a circle.
Parameters
- x — the x coordinate of the center
- y — the y coordinate of the center
- radius — the radius of the circle in pixels
- color — the color as a number or string
- thickness — the thickness of the line (optional, default is 1)
- filled — whether or not to draw the circle filled (or just the outline) (optional, default=false)
Return
- this image
Rotate the image left (counter-clockwise).
Return
- this image
Rotate the image right (clockwise).
Return
- this image
Flip the image across the x-axis, y-axis, or both.
Parameters
- x_axis — boolean, whether or not to flip over the x-axis (flip vertically)
- y_axis — boolean, whether or not to flip over the y-axis (flip horizontally)
Return
- this image
Flip the image across the diagonal that runs from the top-left to the bottom-right.
Return
- this image
Enhance the image in a cinema-like manner; increase sharpness and contrast while reducing saturation.
Return
- this image
Find another image within this image.
Parameters
- other — another image
Return
- an array of coordinate pairs, one for every coordinate where other was found (or an empty array if not found)
Notes
All pixels must match exactly. This is much slower than find_fuzzy().
Find another image within this image using fuzzy matching.
Parameters
- other — another image
- threshold — the distance threshold at which to match (optional, default is 0.01)
Return
-
an object with keys:
- threshold — same as the threshold parameter
- min_distance — the minimum distance found between this image and other
- max_distance — the maximum distance found between this image and other
- matches — an array of coordinate pairs, one for every coordinate where other was found to have distance less than threshold (or an empty array if not found)
Notes
The distance is a number in the range [0,1] which indicates how closely this image and other match. It is calculated at every possible location for other by sampling 64 uniformly-spaced pixels or every pixel in other (whichever is less) and then measuring the difference in luma(). This is much faster than find_exact() and can deal with cases where other does not match exactly but should still be found.
The values returned in the object are to aid with debugging. If other was not found, but was expected to be found, try increasing threshold above min_distance.
Draw text on this image using the ASCII 5x7 font which is typically seen on a Code Page 437 console. (The font face is pixelated and fixed width).
Parameters
- x — the x coordinate of the top-left of the text
- y — the y coordinate of the top-left of the text
- str — the text to draw
- color — the color as a number or string
- scale — how much to scale up the font; must be a positive integer (optional, default is 2)
Return
- the height of the text in pixels
Notes
Each glyph is actually 5 by 8 pixels (the 8th pixel is the descender). This function leaves a 1 pixel margin around the top and left of the glyph, so the total size is actually 6 by 9 pixels per letter. (Assuming scale is 1).
The text is bound by image width, and will wrap.
Draw all ASCII 5x7 glyphs on this image.
Parameters
- scale — how much to scale up the font; must be a positive integer (optional, default is 2)
Return
- this image
Notes
This is so you can view the entire font (since unlike TrueType fonts which typically have a viewer built into the operating system, there is no other way to view the embedded 5x7 font). You can also view the image here:
Reduce the bit depth of each color component, and compensate for the loss in color accuracy by dithering.
Parameters
- num_bits — the number of bits to reduce the bit depth to for each component (original depth is 8) (optional, default is 2)
Return
- this image
Notes
This truncates the color components of each pixel so that instead of being 8 bits, the least significant [8 - num_bits] bits are zeroed.
This is used within hide() for preprocessing.
Hide an image within the least significant bits of this image, also known as steganography
Parameters
- s — another image
- num_bits — the number of bits to use (optional, default is 2)
Return
- this image
Notes
The image s is dithered and has its bit depth reduced to num_bits. It is then hidden in the least significant num_bits of this image, which makes it hard to detect.
Example
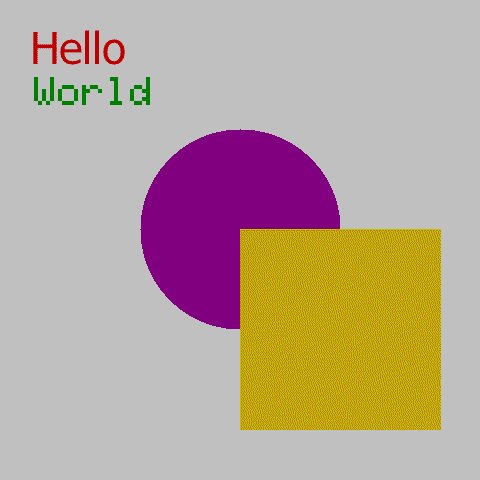
#create message
i = image(480,480).fill('#ccc')
y = i.text(30,20,'Hello','red',40) + 20
y += i.ascii(30,y,'World','green',4) + 20
i.circle(240,y+100,100,'purple',1,true)
i.rect(240,y+100,200,200,'orange',1,true)
i.save('message.png')

#hide message. must save as png or bmp (not jpg).
image(web.dl('https://axm.dev/pic.png')).resize(480,480).hide(image('message.png')).save('hide.png')
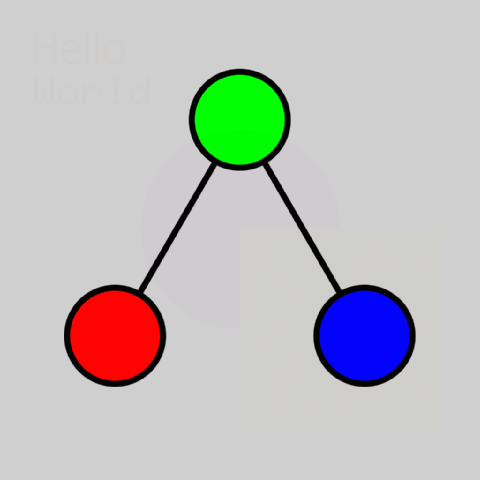
If you look closely, you can see the message image faintly within the output image. (A more detailed input image would hide the message better.)
Reveal the image hidden within the least significant bits of this image.
Parameters
- bits — the number of bits to extract the image from (optional, default is 2)
Return
- this image.
Notes
Replaces this image with the hidden image, if any. This is the opposite of hide().
Example
image('hide.png').unhide().save('unhide.jpg')
Functions
Get EXIF metadata from an image file, typically a JPEG.
Parameters
- path — the path of the file
Return
-
an object containing the following fields:
- width — the width of the image in pixels
- height — the height of the image in pixels
- orientation — the orientation of the image:
- 1 or 2 = right side up
- 3 or 4 = upside down
- 5 or 6 = rotated left (counter clockwise)
- 7 or 8 = rotated right (clockwise)
- See diagram here
- software — the software used to create the image
- copyright — the copyright on the image
- description — the description of the image
- iso — the ISO setting of the camera, which describes the light sensitivity of the sensor; sometimes described as "film speed", because more sensitive films react faster to light exposure
- f_stop — the f-stop setting of the camera, which describes the aperture relative to focal length; larger numbers indicate a wider field of view and shallower depth of field
- exposure_secs — the exposure time in seconds
- focal_length_mm — the focal length in millimeters
- flash — a boolean indicating whether flash was used
-
time — an object with various times in string format
- original — when the picture was taken
- changed — when the picture was changed
- digitized — when the picture was digitized
-
camera — an object describing the camera
- make — the make of the camera
- model — the model of the camera
-
lens — an object describing the lens used
- make — the make of the lens
- model — the model of the lens
- f_min — the minimum f-stop of the lens
- f_max — the maximum f-stop of the lens
- focal_min — the minimum focal length of the lens
- focal_max — the maximum focal length of the lens
Notes
A lot of these values assume the use of a professional camera with a detachable lens (DSLR), and don't really apply to modern cell phone cameras (although cell phone cameras are getting fancier and some have multiple lenses now).
Generate a plot from tabular data.
Parameters
- data — a 2D table of data; first row should be headers
- cols — an array of strings referring to columns within data to examine; the first column is the x-axis and any subsequent columns are the y-axis (optional, default is all the columns in order of appearance)
-
type
—
a string referring to the type of plot to generate (optional, default is "line");
should be one of the following:
- line — generate a line graph (default)
- bar — generate a bar graph
- scatter — generate a scatter plot
- linreg — generate a scatter plot with linear regression lines
- pie — generate a rectangular pie chart
Return
-
an @image containing the plotted data
- If type is "linreg", then three values are added to the object: "alpha", "beta", and "rmse", corresponding to values in the formula: y = alpha*x + beta ± rmse
Example
For these examples we will use IMF GDP data from 2024: imf_gdps_2024.csv
data = io.csv.load(web.dl('https://axm.dev/imf_gdps_2024.csv'))
head = data[0]
body = data.slice(1)
body = body.sort_by_index(head.find(2023),true).slice(0,10)
data = [head]+body
image.plot(data,['Country',2023],'bar').save('bar.png')
#GDP by Country (Billions USD)

data = data.transpose()
data[0][0] = 'Year'
image.plot(data,['Year','United States','China','Germany','Japan','India']).save('line.png')
#GPD by Year (Billions USD)

image.plot(data,['United States','Canada'],'scatter').save('scatter.png')
print image.plot(data,['United States','Canada'],'linreg').save('linreg.png')
##
{
  "class" :
  {
    "scope" : "@image"
  },
  "alpha" : 83.0919,
  "beta" : 0.0801964,
  "rmse" : 161.466
}
##
# GDP of United States vs Canada

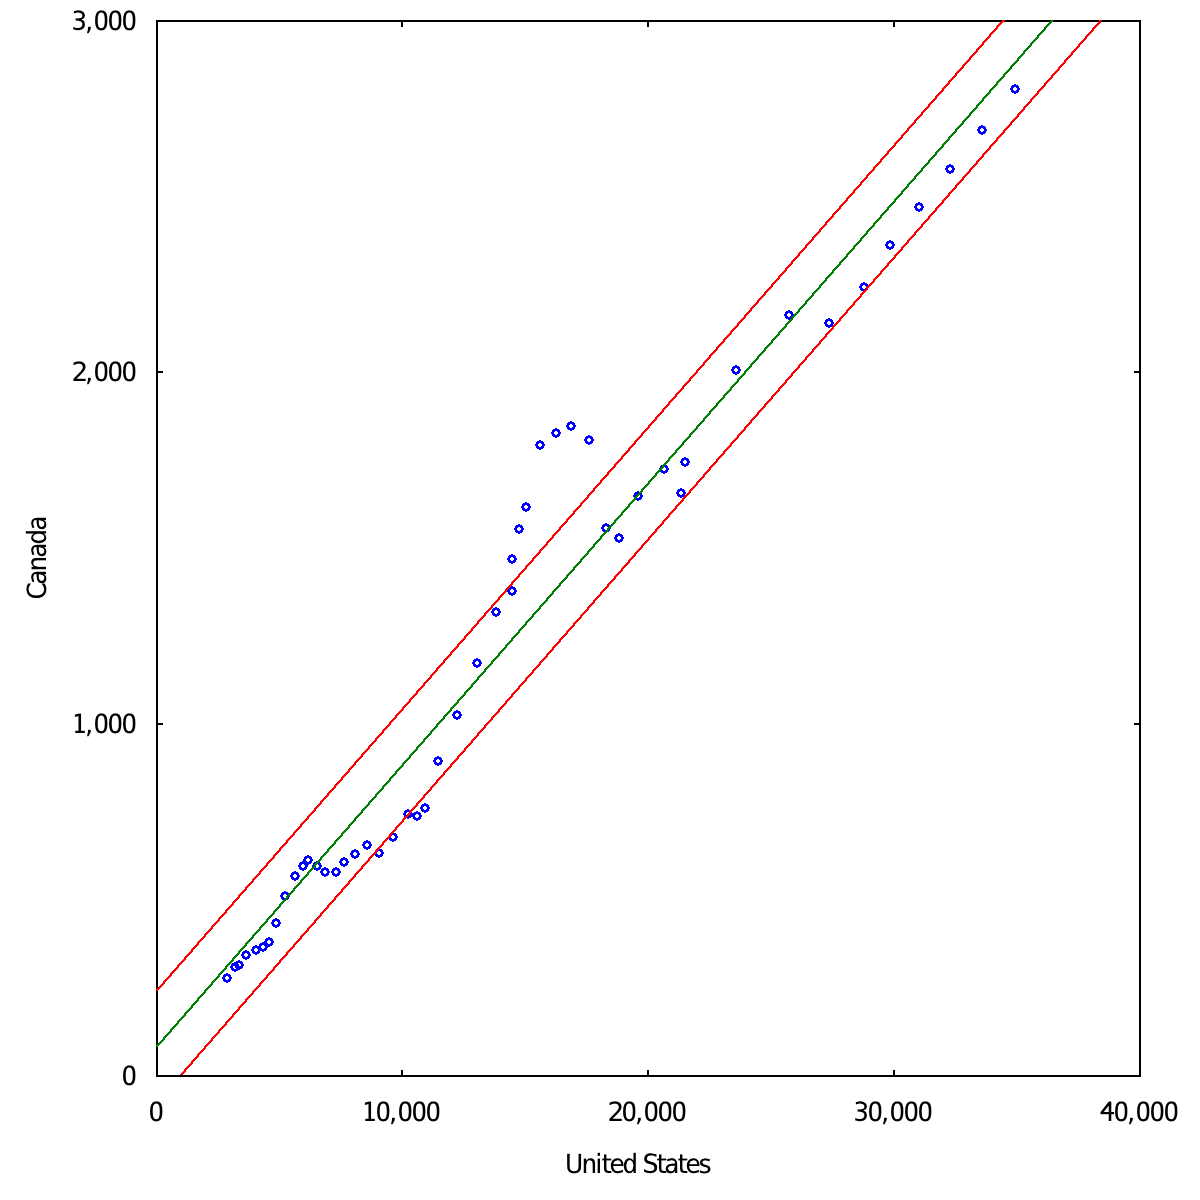
data = io.csv.load(web.dl('https://axm.dev/imf_gdps_2024.csv'))
head = data[0]
body = data.slice(1)
body = body.sort_by_index(head.find(2023),true).slice(0,100)
data = [head]+body
image.plot(data,['Country',2023],'pie').save('pie.png')
#Top 100 Countries by GDP (Billions USD)

Generate QR code for string.
Parameters
- s — a string
Return
- an @image containing the qr code
Notes
Each element in the generated image is 5x5 pixels. The image also includes a 2x (10 pixel) "quiet zone" around the elements.
Example
image.qr('https://axm.dev/').save('qr.png')

